This post may contain affiliate links for which I earn a small commission at no extra cost to you. For more info, check out my Disclosure Policy. Thank you for your support!
Through all the strict nutrition and training plans, there is one thing which makes all this photoshoot prep seem worthwhile: refeed day.
“A refeed is designed to reboot your metabolism,” says PT Steve (he explains it better than me!) “During phases of dieting your metabolism lowers, so the idea is that a large increase in calories and carbohydrates will boost thyroid output, which is your master controller of your metabolism, therefore boosting your metabolism.”
Basically, I get to eat a massive load of amazing food after weeks of strict, low-carb eating. Win.
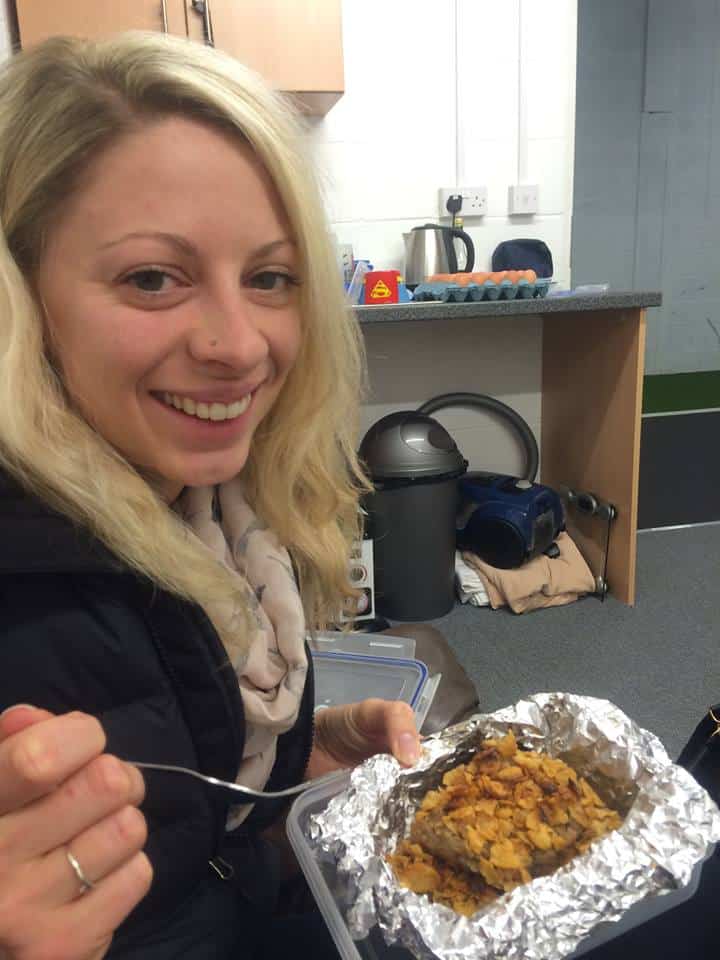
This was the perfect opportunity for me to be able to try out the new Nestlé gluten free honey flakes I was kindly sent to sample. I wanted to try and create something fairly clean, but still deliciously tasty. I had previously opted for flapjack for my last refeed, so thought I would go for a flapjack-cross-banana-pudding type thing…
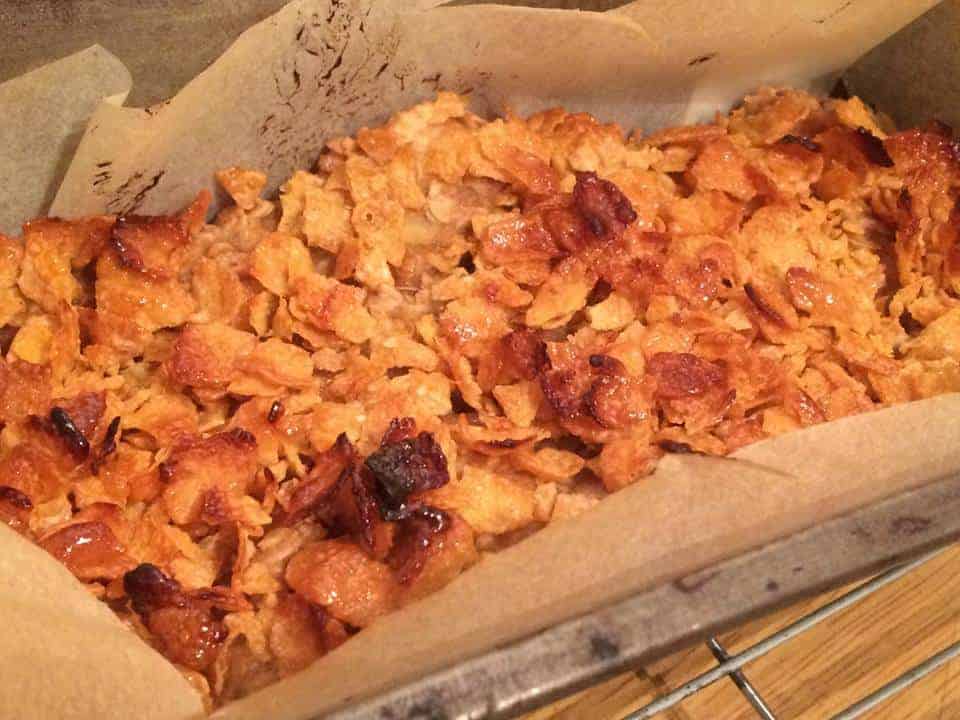
It turned out amazing! Sticky, sweet and with a crunch, it was just what I needed – and left me feeling leaner the next day! This was made to fit my exact macros (I ate the whole thing!) but would be good to dish up in portions.
Gluten free banana and maple oat pudding
Gluten free, egg free, high carb, low fat
2 large bananas
25g unsalted grass fed butter
80g Nairn’s gluten free Scottish porridge oats
45g maple syrup
1/2tsp ground cinnamon
25g Nestlé gluten free honey flakes
- Preheat the oven to 180’C and line a baking tray with baking paper.
- Mash or blend the bananas – you want them to be fairly mushy, but a couple of chunks are good too.
- Add the banana, oats, butter and syrup to a pan and heat on a low heat until the butter has melted, stirring.
- Pour the mixture into a pan and flatten down.
- Crush the honey flakes up a little and sprinkle on top.
- Bake for approx 20-25 minutes – be wary of burning the flakes on top. If they start to catch, lay some foil lightly over the top to protect them.
- Remove from the oven and serve hot – this would be amazing with ice cream or custard! Enjoy 🙂


1 Comment