This post may contain affiliate links for which I earn a small commission at no extra cost to you. For more info, check out my Disclosure Policy. Thank you for your support!
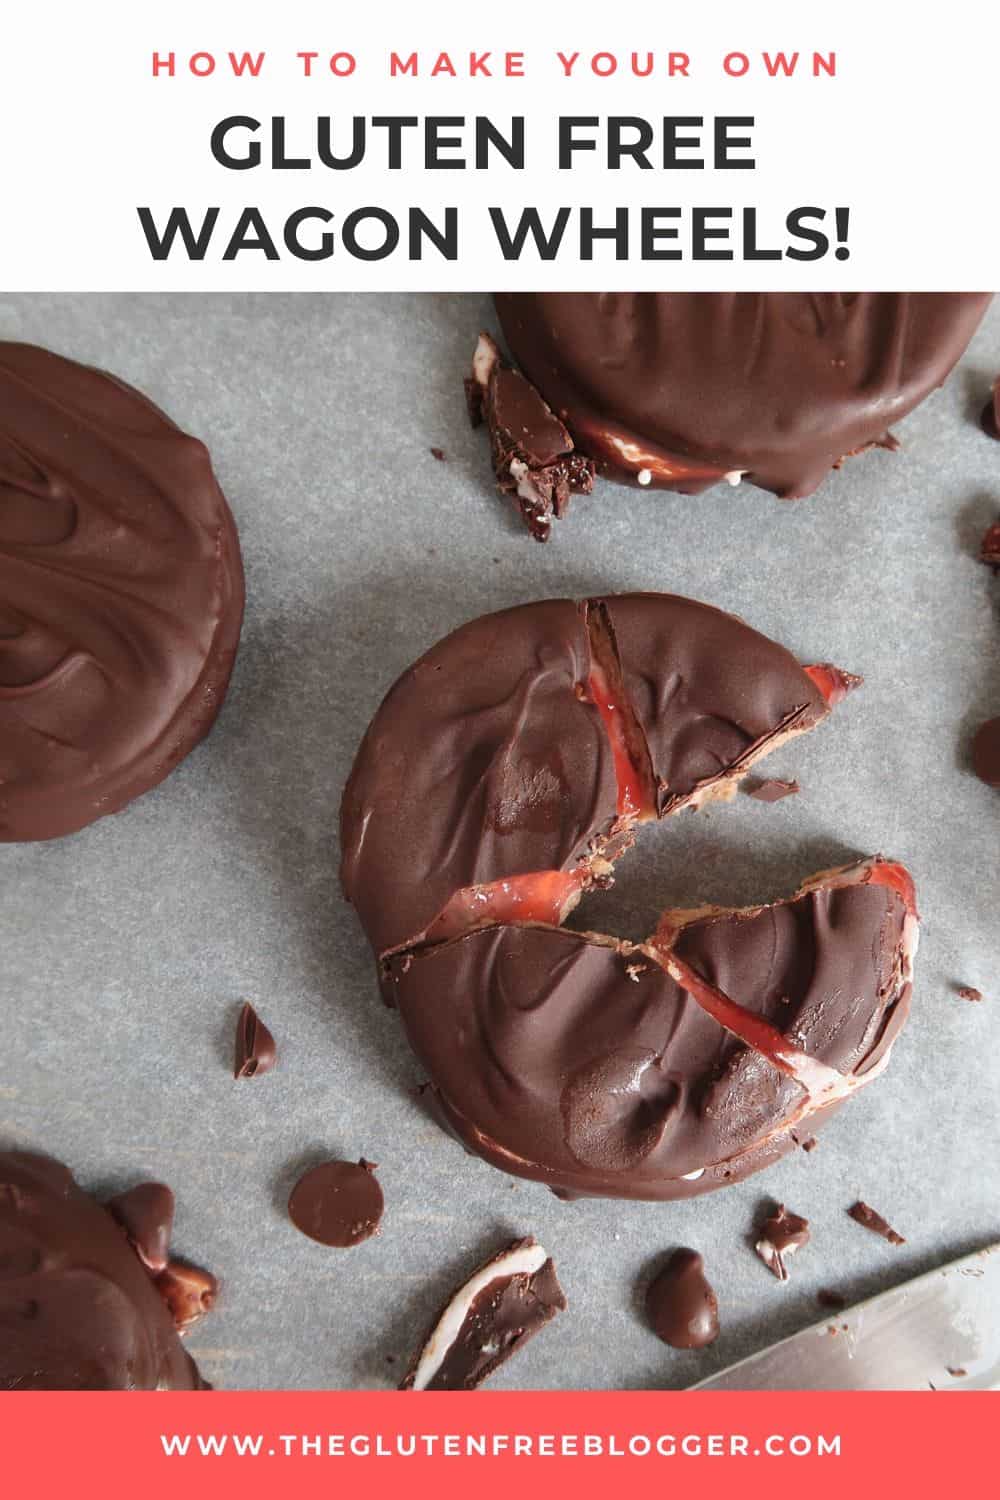
Wagon Wheels were my absolute FAVOURITE at a child – and I’ve finally managed to create a recipe for the perfect gluten free Wagon Wheels.
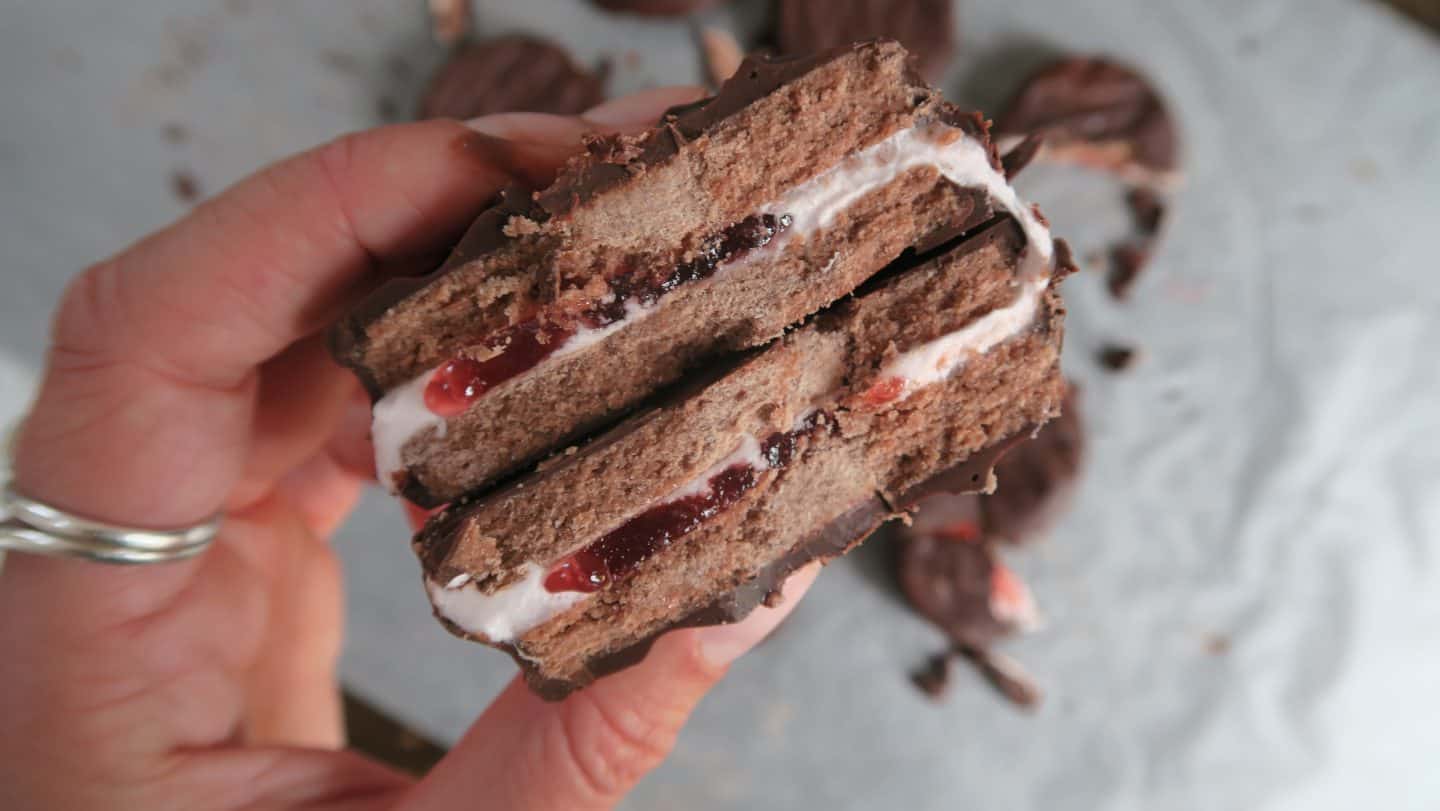
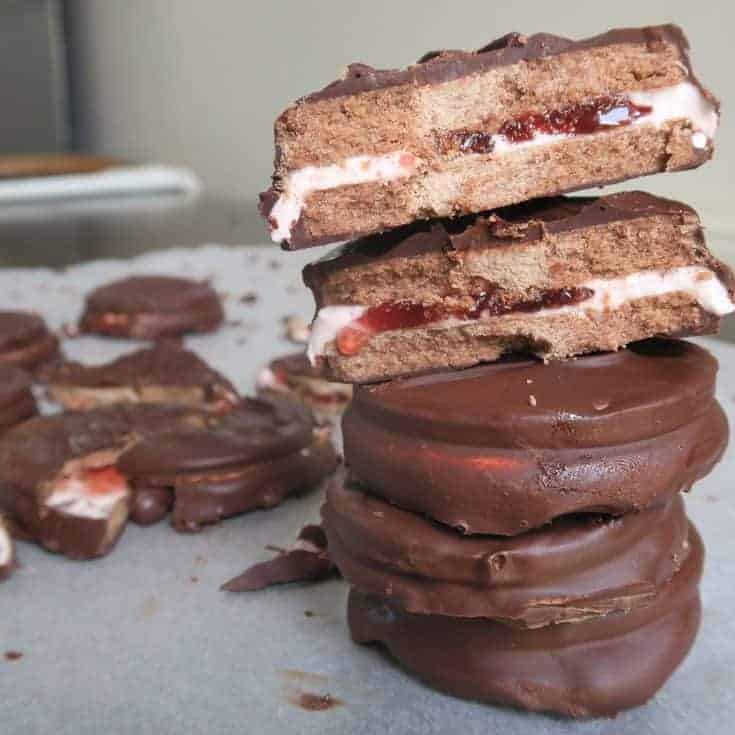
With thick chocolate, crunchy biscuits, a splodge of jam and delicious, gooey marshmallow, these will take you right back to your childhood.
Wagon Wheels were a regular in my school lunchbox when I was a child, before I was diagnosed with coeliac disease.
I used to love pulling them apart and eating the biscuit, saving the gooey centre for last.
I’m not entirely sure that’s how you were supposed to eat them, but hey! I always wished for the day they would bring out gluten free Wagon Wheels, but sadly that day never came.
When I visited the Allergy and Free From Show last year, I came across Ananada Foods, who make vegan Wagon Wheels – and a gluten free version too.
They were absolutely fantastic, and after visiting them again this year and stocking up, I knew I had to give them a go myself.
I couldn’t wait to have them only once a year!
Making gluten free Wagon Wheels
And let me tell you, this recipe was a labour of love. I had to try so many different gluten free biscuit recipes before I could find one which would hold its shape and not spread in the oven.
The first batch spread into one big mush, and then crumbled to pieces.
The second got forgotten about and burnt to a crisp.
The third were okay but too thick, and the fourth hit the jackpot.
Next was the challenge of the marshmallow – and be prepared for some sticky fun!
Luckily, I’ve now figured out the best way to handle this, and my kitchen has been thoroughly marshmallow-ed just to find a failsafe way for you to try this!
I had a few attempts with this, first dolloping it on with a spoon (messy) and then attempting to set the marshmallow in a tray and cutting out circles (even more messy!).
Finally, I found piping the semi-set marshmallow on was the way forward!
You could easily vary these gluten free Wagon Wheels to try different flavours too.
You add more cocoa to the biscuits for a chocolate flavour, play with food colourings in the marshmallow, use white or milk chocolate in the coating, or go for different flavours of jam.
They’re really flexible and now I’ve done the hard work for you in finding the ultimate gluten free Wagon Wheel recipe, they’re pretty quick and simple to make too.
They’re also great fun to make with the kids. Once the marshmallow is in the piping bag it’s relatively mess-free.
But then cooking should be a bit mess, right?
Dipping the Wagon Wheels in melted chocolate also makes for some great scenes, and children will absolutely love it.
My Gluten free Wagon Wheels recipe
I know you’re dying to get in the kitchen, so I’ll stop rambling on. Here is my recipe for gluten free Wagon Wheels!
I’d recommend, if you can, using the exact gluten free flour I use, and the Stork for baking if you can.
I haven’t tried this with dairy free butter/marge so not sure how well it would subsitute, but if you want to make a dairy free version, I’d love to hear how it goes!
Gluten free Wagon Wheels
As a child I loved Wagon Wheels, but I missed them so much post coeliac disease diagnosis! So I decided to create my own gluten free Wagon Wheels, complete with gluten free biscuits, gooey marshmallow and lots of jam!
Ingredients
For the biscuits:
- 50 g Stork
- 50 g caster sugar
- 200 g Dove's Farm plain gluten free flour
- 1 large egg white
- 1/4 tsp xantham gum
- 1 tsp cocoa powder
- 1/2 tsp vanilla essence
- 1 pinch salt
- 2 tsp water, (optional in case dough it too dry)
For the filling:
- 150 g pink and white marshmallows
- 5 tsp seedless strawberry jam
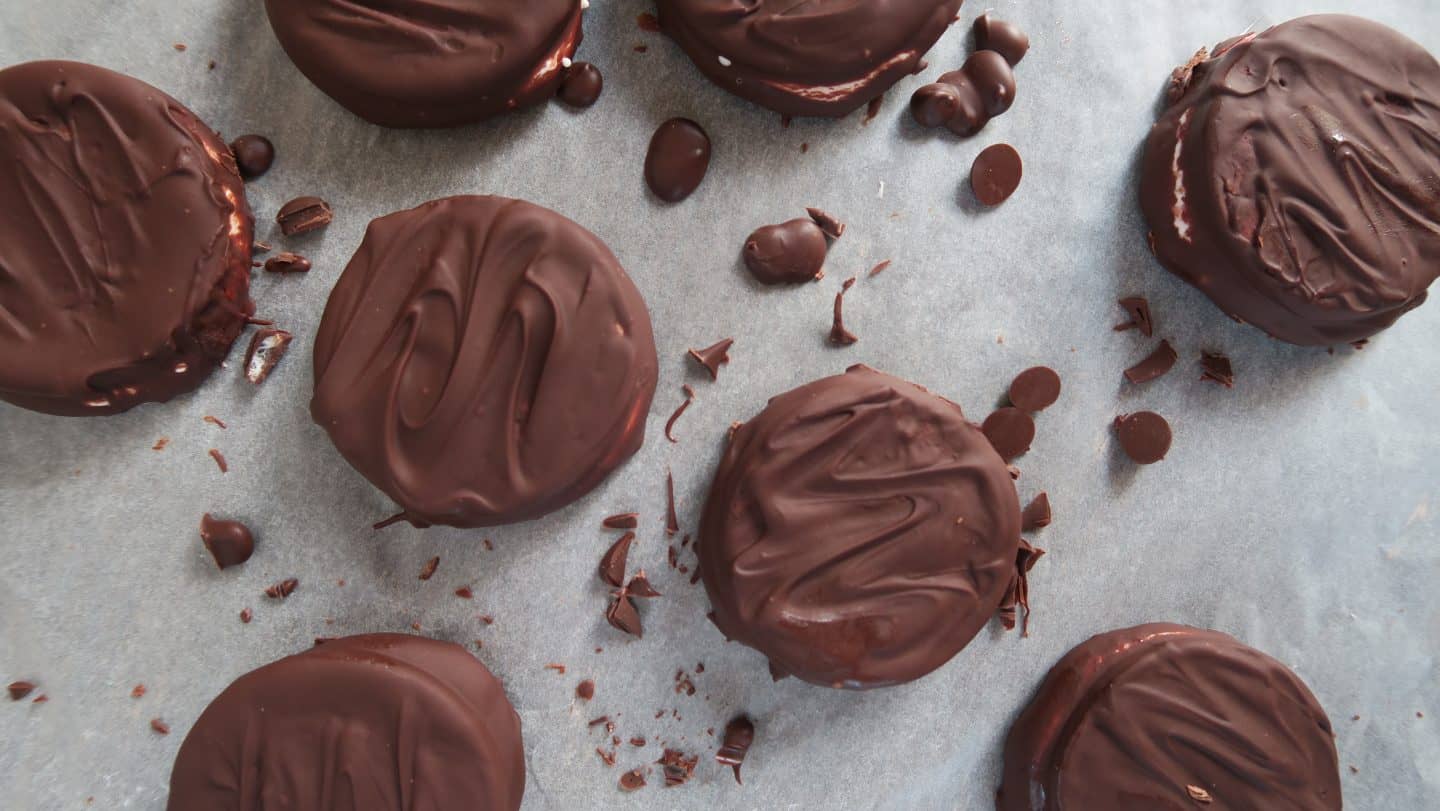
- 150 g dark chocolate
Instructions
For the biscuits:
- Preheat the oven to 180'C / Gas 4 and line two baking trays with baking paper. Set aside.
- Add the Stork, sugar and salt to a large mixing bowl and cream until pale using either a wooden spoon or a handheld mixer.
- Add the egg white, flour, cocoa, vanilla essence and xantham gum. Using your hands bring the mixture together. It may appear a bit crumbly at first but keep kneading with your hands until it comes together in a dough. You should be able to scrunch it in your fist and it doesn't crumble. If it's too crumbly, add the water 1/2 tsp at a time.
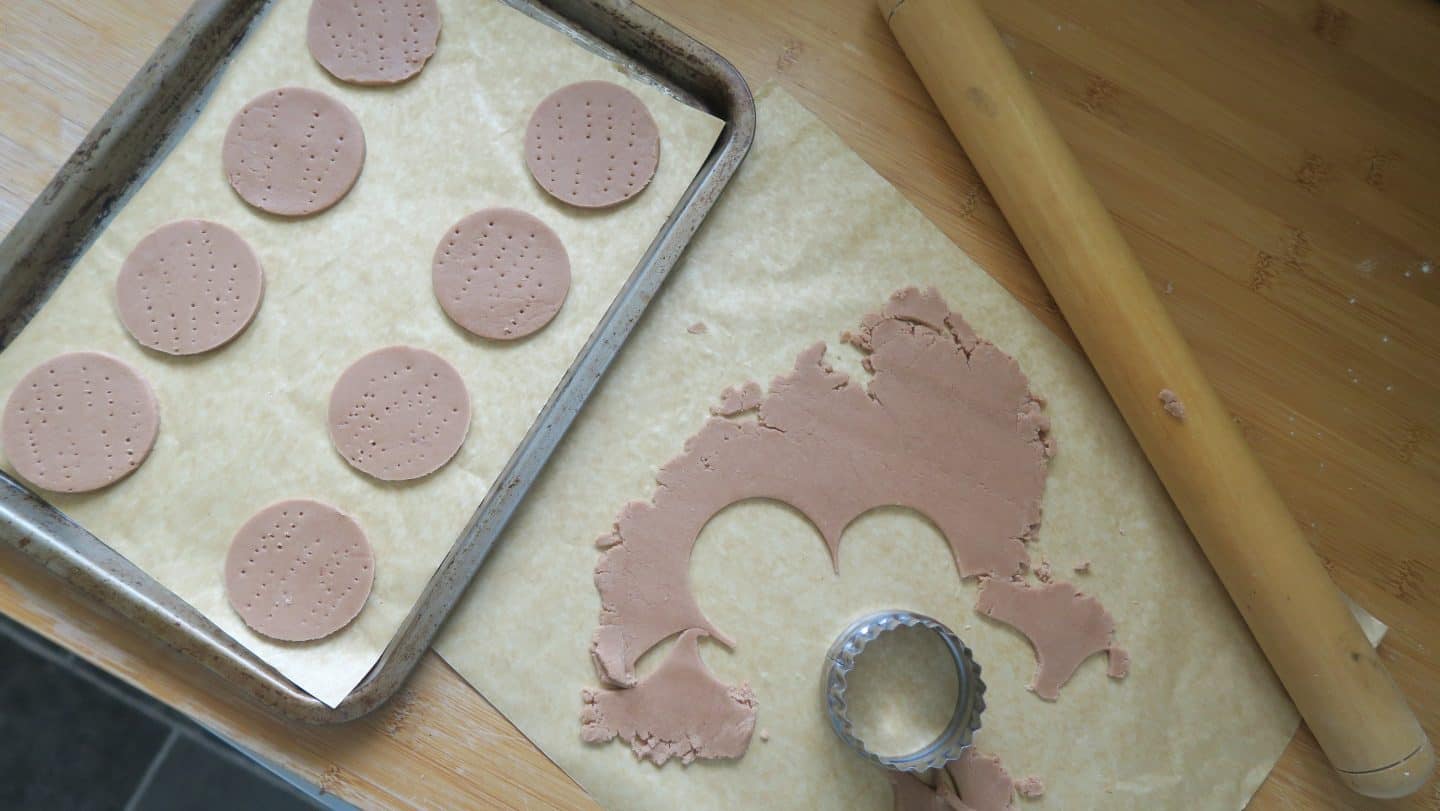
- Tip dough mix out onto worktop and roll out to around 5mm-1cm thick (see note 1) and using a 2.5-inch cookie cutter, cut out 10 shapes. Place evenly on the baking tray (allow a little room, but they shouldn't spread) and prick the tops with a fork. Bake for 9-10 minutes, remove from the oven and cool completely on a cooling rack.
To assemble:
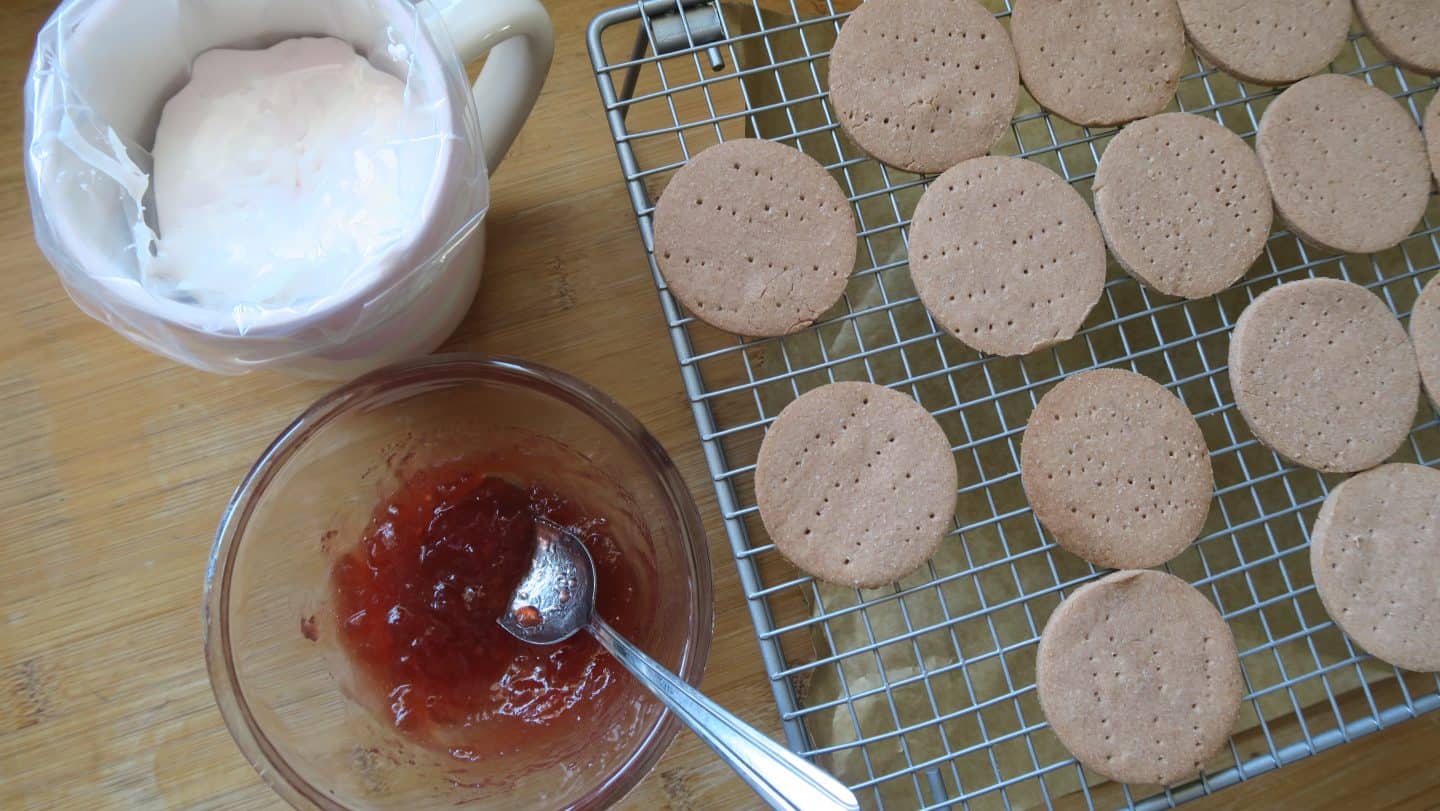
- Place the marshmallows into a bowl and microwave for 45 seconds. Stir with a spoon and then spoon into a piping bag before they cool too much. Set aside for 2-3 minutes to cool.
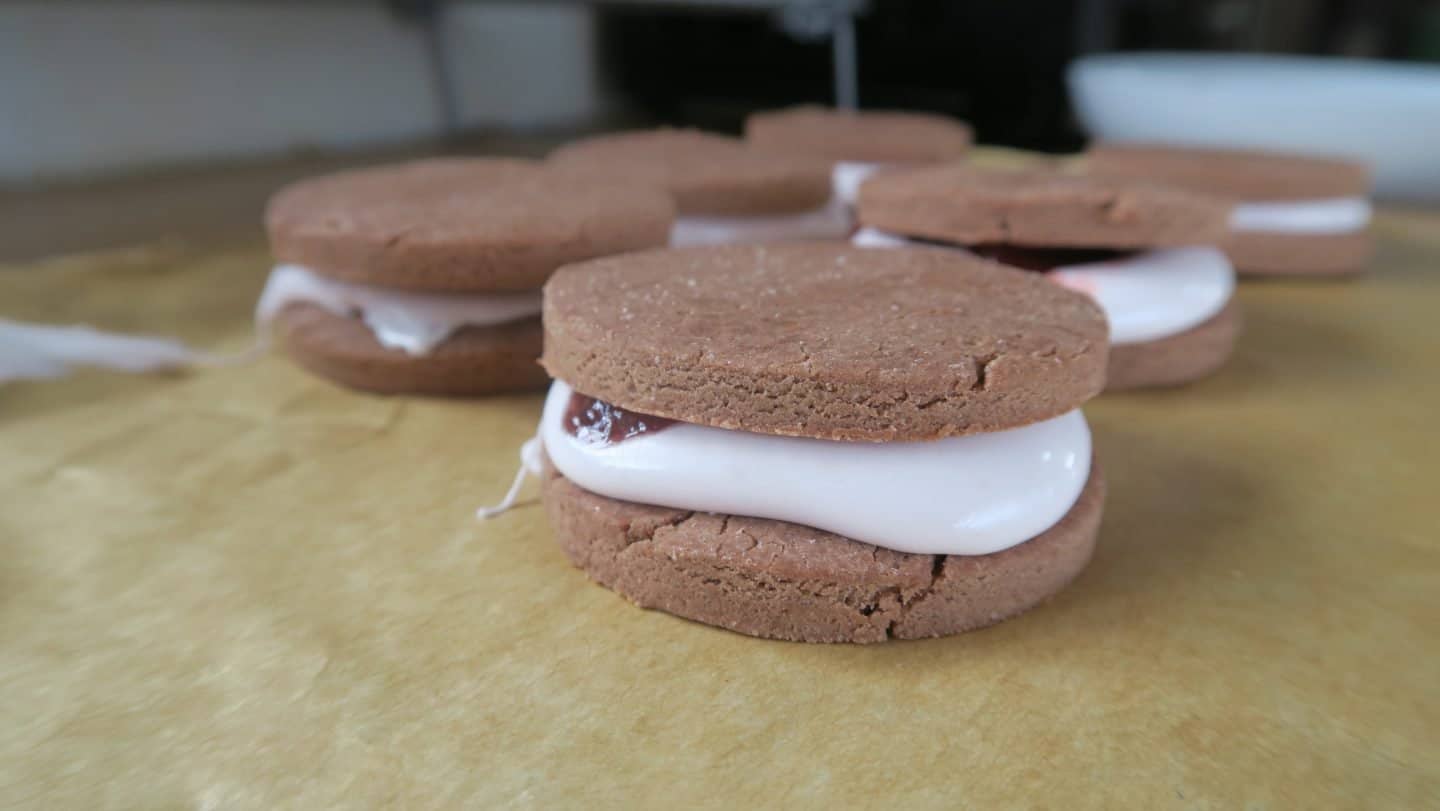
- Pipe the marshmallow onto 5 of the biscuits. (You want this to be about 1cm from the edge and fairly thick, so that when you put the second biscuit on top, the marshmallow doesn't escape everywhere!). Leave for around 30 seconds to cool slightly, then place 1/2 tsp of jam on top. (See note 2)
- Place the second biscuit on top and leave to cool at room temperature for five minutes. Meanwhile, melt the chocolate in the microwave or in a bowl over hot water.
- Use the 'dip and roll' technique to dip the wheels, side on, into the melted chocolate and then roll them, so that the chocolate coats and seals the outside. Place back onto a wire baking tray. Once you've done this with all the biscuits, use a knife or spoon to coat the tops of each wheel evenly with the remaining chocolate. (see note 3)
- Cool in the fridge for an hour, and then these are ready to be enjoyed!
Notes
- I find it easier to roll the dough between baking paper sheets as it can get a bit sticky as it warms. Use a little extra flour to dust the dough and your rolling pin too.
- I find with the jam if you warm it in the microwave for around 10 seconds, it makes it a little easier to shape on the wheels.
- If you want to coat both sides, wait for the top to cool before flipping the biscuits and then coating the other side.
This recipe does appear rather wordy, but it's very simple, I promise! I have just tried to explain each step thoroughly to make it easier to follow.
And if you have any recipe suggestions, please let me know in the comments what you’d like to see next, I love a challenge!
If you like this recipe, why not try my gluten free millionaire’s shortbread, or my gluten free citrus drizzle cake? for some more sweet treats!
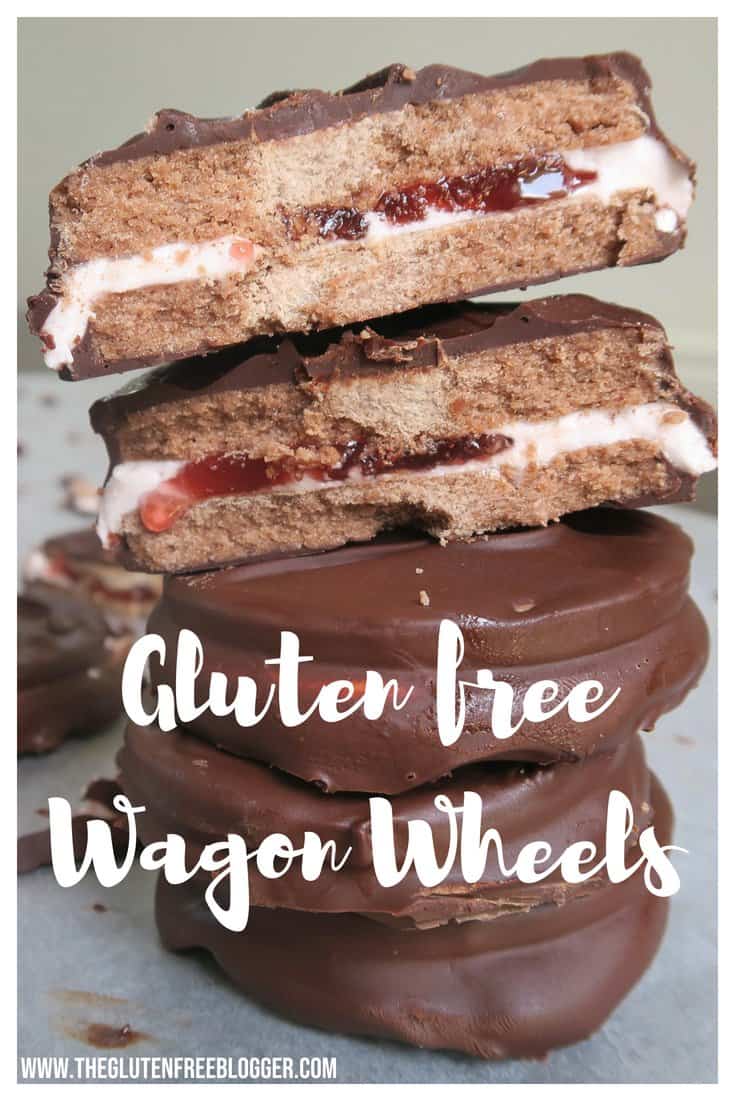
Like this recipe? Make sure you pin this recipe card below for later!


These look gorgeous Sarah, I’ve got a recipe in my book for gluten free wagon wheels too, it’s a MUST that every child (and big kids like us) should have a wagon wheel at some point in their lives. Brilliant that you’ve got the jam in their too.
Stork is the best I’ve found for dairy free baking where you need a solid dough like biscuits, scones or crumbles as none of the others I’ve tried are hard enough and things spread too much!
Is stork dairy free? My niece is dairy intolerant and some of the dairy free spreads are too loose for baking with
This recipe looks fab, I can’t wait to try it. What do you think I can substitute if I can’t get Stork? Thanks!